
How to DIY Waterproofing Solutions in Roof?
To DIY waterproof your roof, first clean the surface to eliminate debris. Check for damaged or missing asphalt shingles and replace them as necessary.
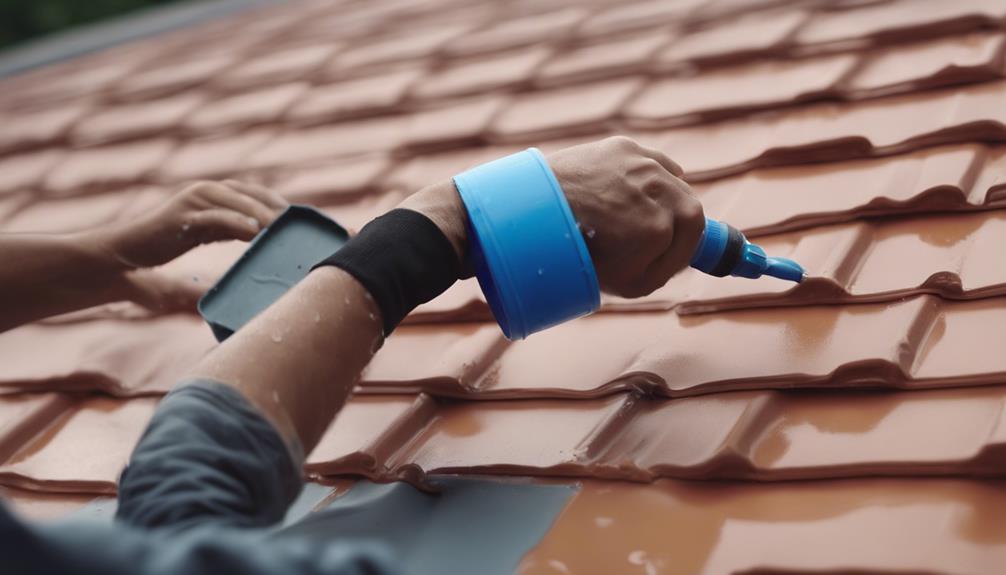
Then, apply a liquid waterproofing membrane; mix it per the manufacturer’s guidelines and use a brush or roller for an even application. Seal seams and corners effectively.
If needed, reinforce with a textile bandage. Perform regular maintenance by inspecting for damage and resealing every few years.
Following these steps will significantly extend your roof’s lifespan and prevent leaks.
How Do You Maintain DIY Waterproofing Solutions?
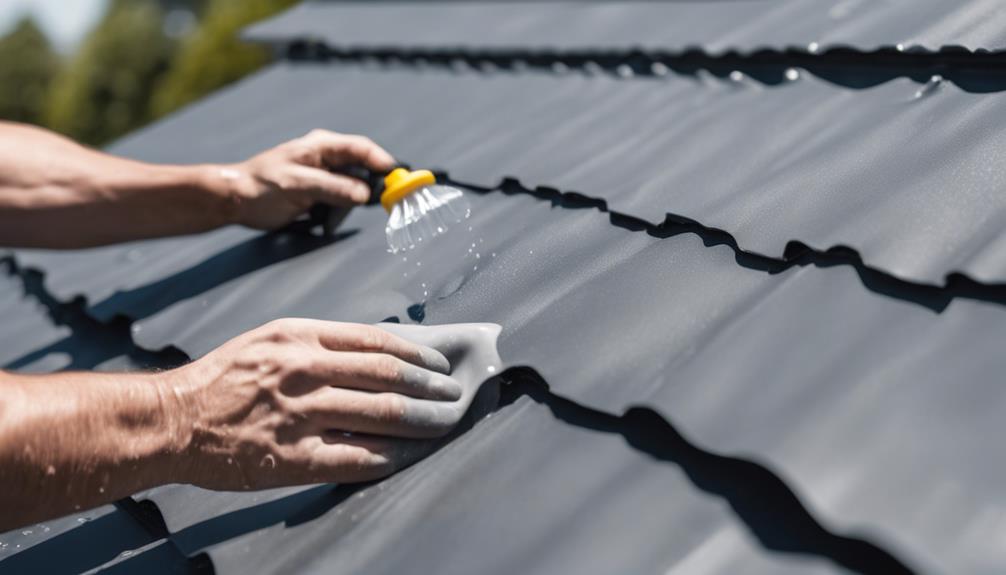
To maintain DIY waterproofing solutions, perform regular inspections and upkeep to ensure long-lasting protection against water damage.
Key practices include:
- Attic Inspection: Check for signs of water damage like mould or discolouration.
- Debris Removal: Clear leaves and dirt to prevent water pooling.
- Tree Trimming: Cut back overhanging branches to minimize roof damage.
- Shingle Replacement: Fix missing or damaged shingles promptly to prevent leaks.
Additionally, reseal your roof every few years and clean gutters regularly to boost waterproofing effectiveness. These maintenance steps will help protect your home from costly water damage.
How Do You Apply a Liquid Waterproofing Membrane?
To apply a liquid waterproofing membrane, prepare the surface by removing grease, dirt, old paint, and organic growth. Clean the area with mentholated spirits, and use a primer if needed for sealing.
Mix the liquid waterproofing membrane according to the manufacturer’s instructions. Apply with a brush, roller, or spray gun for an even coat. Apply multiple layers, allowing each to dry completely, with a minimum two-inch overlap on sections.
For corners and intricate areas, use a brush for full coverage and consider a textile bandage for reinforcement at joints or penetrations. Follow the manufacturer’s recommendations for the number of coats, thickness, and safety precautions to ensure a durable waterproof barrier.
What Is the Process for Installing a Sheet Membrane?
The process of installing a sheet membrane involves several key steps to ensure proper adhesion and functionality.
- Surface Preparation: Clean and prime the surface to remove debris, grease, and old materials.
- Cutting the Membrane: Measure and cut the membrane to size, allowing for overlaps at seams.
- Placement:
- Use a roller or spatula to eliminate air bubbles.
- Fold and seal corners to ensure a watertight fit.
- Secure the membrane with fasteners to prevent movement.
- Finishing: If needed, apply a finish, particularly on vertical surfaces.
- Layering: Follow manufacturer guidelines for additional layers, allowing each to dry completely before applying the next.
Adhering to these steps will result in a reliable waterproofing solution, protecting the structure from water damage and enhancing its longevity.
How Do You Use Sealants and Coatings for Waterproofing?
To use sealants and coatings for waterproofing effectively, start by preparing the surface to ensure it is clean and free of debris, grease, and prior coatings for optimal adhesion.
Next, choose a suitable sealant or coating and adhere to the manufacturer’s guidelines for mixing and application. Application methods can include brushes, rollers, or spray guns, and achieving an even layer is crucial to maintaining a reliable waterproof barrier.
When applying liquid waterproofing membranes, work in overlapping sections and ensure corners and joints are thoroughly covered, using brushes or textile bandages. Allow each layer to dry completely as directed before adding more layers.
For acrylic sealants, they generally offer immediate waterproofing after a brief drying time. Always prioritize safety measures and follow health protocols when handling these materials to ensure effective waterproofing and personal safety.
When Should You Apply a Second Coat or Additional Layers?
Applying a second coat or additional layers is necessary when the first layer is uneven, insufficiently thick, or when product instructions indicate that multiple coats are required for optimal waterproofing. Layering improves the waterproofing material’s protective qualities and extends its durability, especially in regions with harsh weather.
Consider adding extra layers in these situations:
- Uneven Surface: If the initial coat shows visible streaks or patches, a second coat will create a more uniform appearance.
- Inadequate Thickness: If the first layer does not meet the recommended thickness, additional coats will enhance waterproofing.
- Product Guidelines: Always check the manufacturer’s specifications, as some materials require multiple layers for maximum effectiveness.
- Roof Age: Older roofs or those with previous waterproofing challenges may need additional layers for complete protection.
Addressing these factors will significantly improve your waterproofing efforts, protecting your roof from potential water damage.
Frequently Asked Questions
What Tools Do I Need for DIY Roof Waterproofing?
For DIY roof waterproofing, the essential tools required include a pressure washer, paintbrushes, rollers, a spray gun, seam tape, liquid rubber, a utility knife, and safety gear such as gloves and goggles. These tools ensure proper application and personal protection during the project.
How Long Does It Take for Waterproofing Materials to Dry?
Waterproofing materials typically dry within 2 to 24 hours for liquid membranes, while coatings may require a longer duration. Always refer to the manufacturer’s guidelines for precise drying times.
Can I Waterproof My Roof in Winter?
Waterproofing a roof in winter is possible but challenging. Use cold-weather products and ensure surfaces are clear of ice and snow for optimal adhesion.
What Are the Signs of a Failing Waterproofing System?
Signs of a failing waterproofing system include visible water stains, mould growth, peeling paint, and warped shingles. Other indicators are persistent leaks and increased energy costs. Regular inspections are crucial to identify and address these issues promptly to maintain structural integrity.
How Do I Choose the Right Waterproofing Product for My Roof?
To choose the right waterproofing product for your roof, assess material compatibility, local climate, application techniques, and manufacturer specifications. Focus on durability, flexibility, and environmental resistance for optimal effectiveness and longevity.
